Creating Work Orders in Mobility
Outcomes: Gain an understanding of how to create Work Orders using the Brightly Assetic Mobile application.
Prerequisites: User roles must be configured appropriately as per the Assetic Mobility User Roles.
Users are able to create Work Orders while in the field using the Brightly Assetic Mobile application. There are two ways by which users can create Work Orders:
-
The ‘Add’ button in the Work Orders tab
-
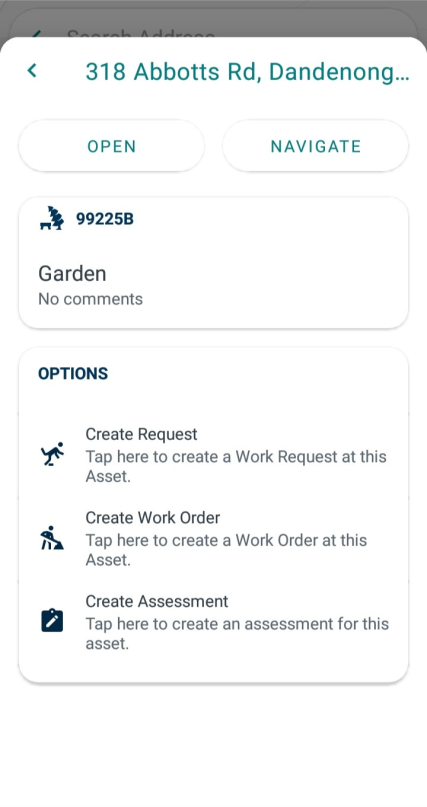
Selecting an Asset in the Map View
Create Work Orders via Add Button
Upon logging into the Brightly Assetic app, users will see the Home page.
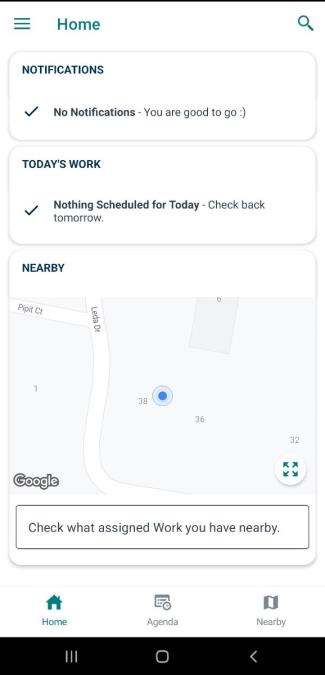
Select the hamburger icon ( ) on the top left and select Work Orders.
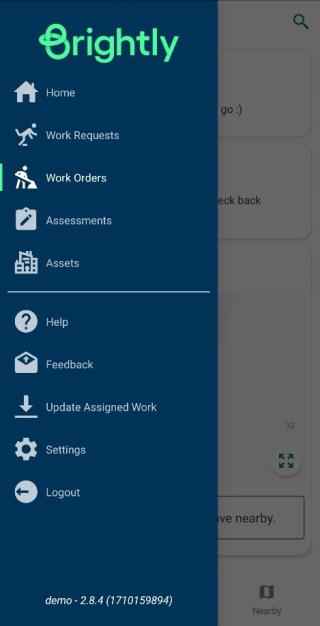
Select the Add button at the bottom right ( ) and it will open the Work Order creation page.
NOTE Users can also use the Import from JP button ( ) to auto-populate some of the Work Order fields after selecting the asset.
Info Tab
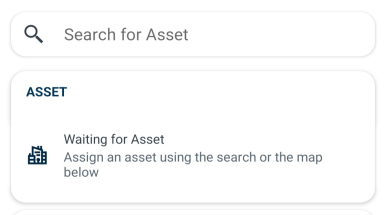
Users can search for a specific Asset to be assigned to the Work Order by searching for the Asset Name or Asset ID.
A screenshot of a computer
-
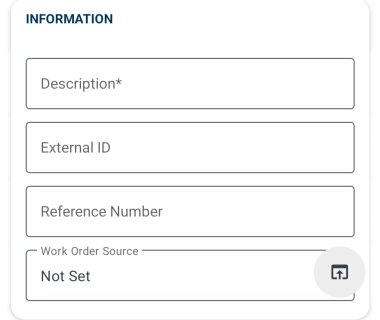
Description: A free-text field to allow users to enter a brief description of the Work Order.
-
External Id: This field is available to reference an external ID either through integration or manual input.
-
Reference Number: A free-text field that can be used to store any reference number. If the Work Order was created from a Work Request, this field will be pre-populated with the Reference Number field from the Work Request.
-
Work Order Source: An optional drop-down field in which users can select Public Enquiry, Routine Inspection, or Safety Inspection to record the source of the Work Order.
-
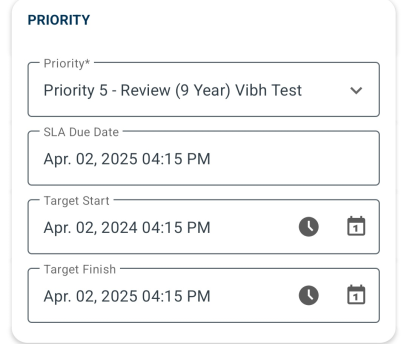
Priority: The priority is selected from a drop-down list. The priority is configured in the Admin Maintenance area and is linked to an Asset Type. This assists in generating the SLA Due Date.
-
SLA Due Date: The Service Level Agreement (SLA) due date is automatically generated after the priority has been selected.
-
Target Start: The Target Start date is automatically generated based on the priority when creating a Work Order from a Work Request. It can be adjusted or set by selecting the calendar button to change the date and the clock button to change the time.
-
Target Finish: The Target Finish date is automatically generated based on the priority, however, it is also able to be edited manually by selecting the calendar button to change the date and the clock button to change the time. This must be set after the Target Start date.
-
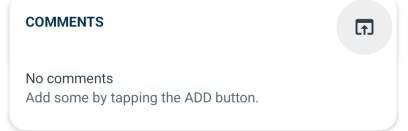
Comments: An optional free text field used to record comments associated with the Work Order.
-
Description automatically generated
-
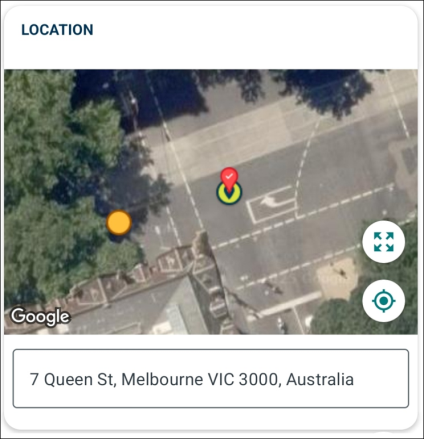
Location: The Location panel allows the user to define the location of where the Asset or defect is located globally.
Config Tab
-
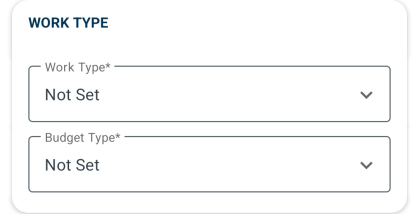
Work Type: A mandatory drop-down field to select the type of Work.
-
Budget Type: This field is automatically populated depending on the work type selected. All types are assigned OPEX coding whereas PJ is assigned CAPEX.

-
Failure Code and Sub-Code: The drop-down list details the failure code and sub-code that is populated as a result of the FCR that is allocated to an asset category.
-
Cause Code and Sub-Code: The drop-down list details the cause code and sub-code that is populated as a result of the FCR that is allocated to an asset category.
-
Remedy: The drop-down list details the remedy code that is populated as a result of the FCR that is allocated to an asset category.
-
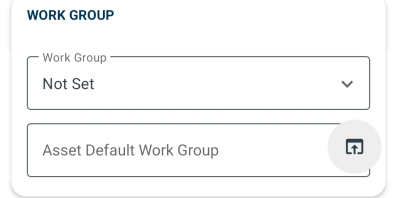
Work Group: A dropdown to select the Work Group for the Work Order, from the Work Groups that the Asset belongs to. By default, this is populated automatically with the Asset's Default Work Group.
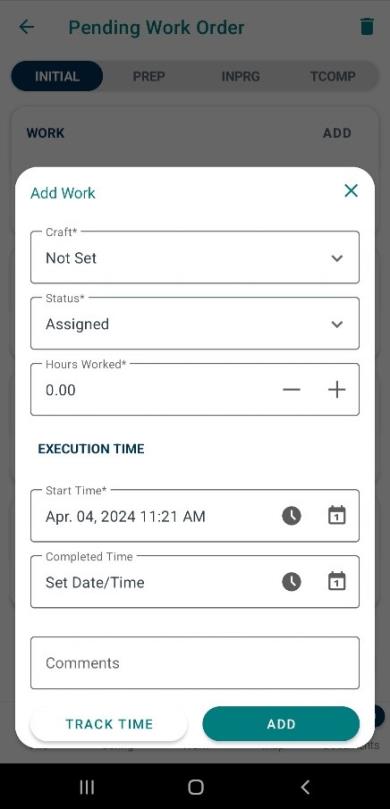
Work Tab
Work
Clicking the Add button in the Work section will open the following dialog box:
-
Craft: This is a drop-down field to select the Craft associated with the selected Work Group.
-
Status: Users can Assign, Unassign and Complete the Work via this drop-down.
-
Hours Worked: This field is manually edited when the work order is completed.
-
Start Time: This is manually edited by selecting the calendar button to change the date and the clock button to change the time to reflect the actual start time.
-
Completed Time: This is manually edited by selecting the calendar button to change the date and the clock button to change the time to reflect the actual finish time.
-
Comments: An optional free text field used to record the comments associated with the Work Order.
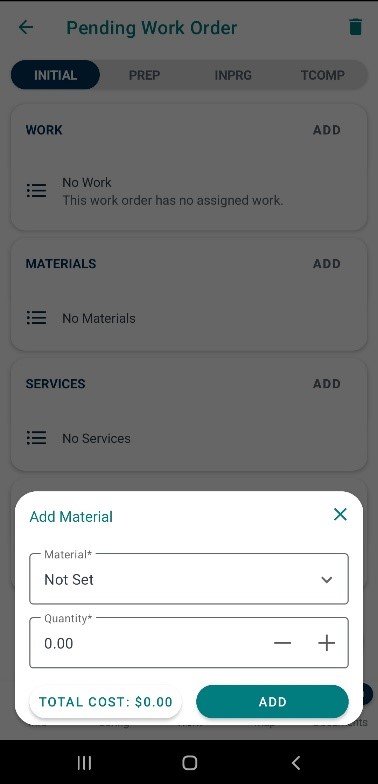
Materials
Clicking the Add button in the Materials section will open the following dialog box:
-
Material: Select the material from the drop-down list.
-
Quantity: The actual amount of the Material used.
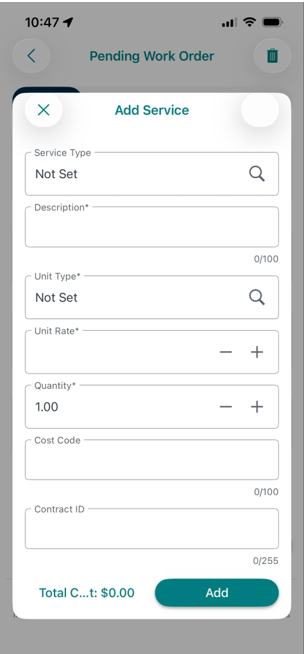
Services
Clicking the Add button in the Services section will open the following dialog box:
-
Service Type: An optional field to select a Service Activity, which will pre-fill the Description, Unit Type, and Unit Rate fields, as configured in the Maintenance Admin module.
-
Description: A description of the Service. This can be pre-filled by selecting a Service Activity from the Service Activity field when adding a Service.
-
Unit Type: The unit type that the Service quantity and rate is measured in. This can be pre-filled by selecting a Service Activity from the Service Activity field when adding a Service.
-
Unit Rate: The actual per-unit cost of the Service. This will populate by default with the same value as the Planned Unit Rate but can be changed.
-
Quantity: The actual amount of Service required.
-
Cost Code: An optional free text field to populate cost code, if applicable.
-
Contract ID: An optional free text field to populate the Contract ID, if applicable.
Work Tasks
Clicking the Add button in the Work Tasks section will open the following dialog box:
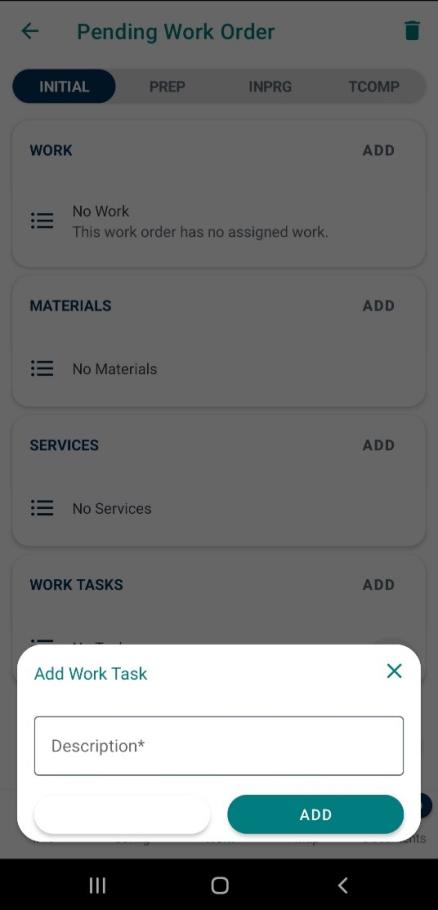
-
Description: A free text field to add a description of the Work Task.
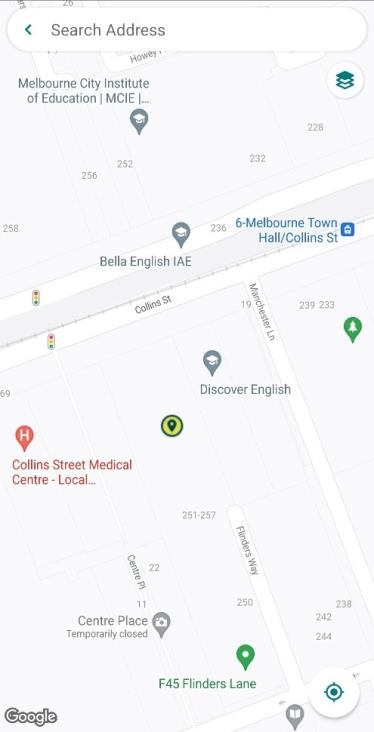
Map Tab
Clicking the Map tab will open the Map view to edit the spatial location of the asset. This can be done by selecting and holding the desired location on the map, then selecting the tick button to confirm.
Documents Tab
Clicking the Document tab will open the following pop-up to select the documents from.
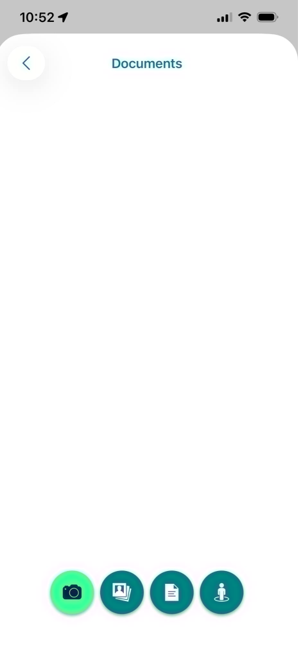
Users can upload documents via Camera, Gallery, Files, or Street View buttons. When uploading from the Gallery or Files, users can select up to 10 documents at a time to upload them in one action.
Once the required information has been filled, users can save the Work Order via the Save button ( ). If the Work Order is in INPRG status, users can select the Complete button (
 ) to complete the Work Order. Upon making one of these selections, the Work Order will be synced with the cloud.
Create Work Orders via Map View
To create a Work Order against an asset selected from Map view, first select the ‘nearby’ icon from the home screen or the Map icon from the Work Orders section. The Map view will have different icons for clusters of assets, individual assets and open Work Orders.
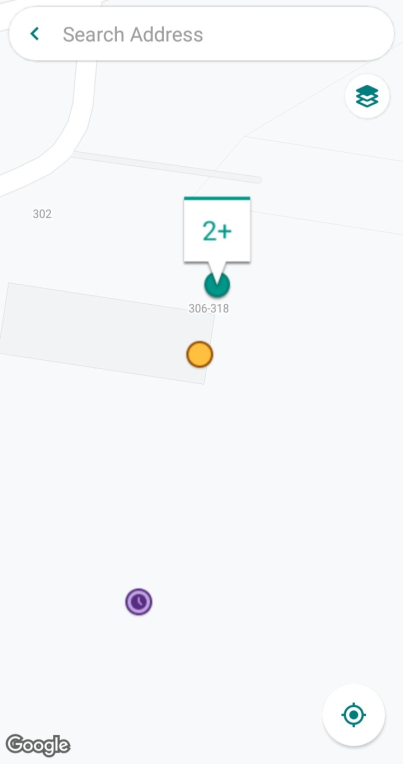
Select an individual asset to show the pop-up menu, then select ‘Create Work Order’. Then follow the same steps described in the previous section to create and configure the Work Order.
NOTE The options on the above screen will vary depending on the roles/permissions the users have.
